

DIY Waste Shredder Fabrication: Build Your Own Recycling Machine
2026-05-16
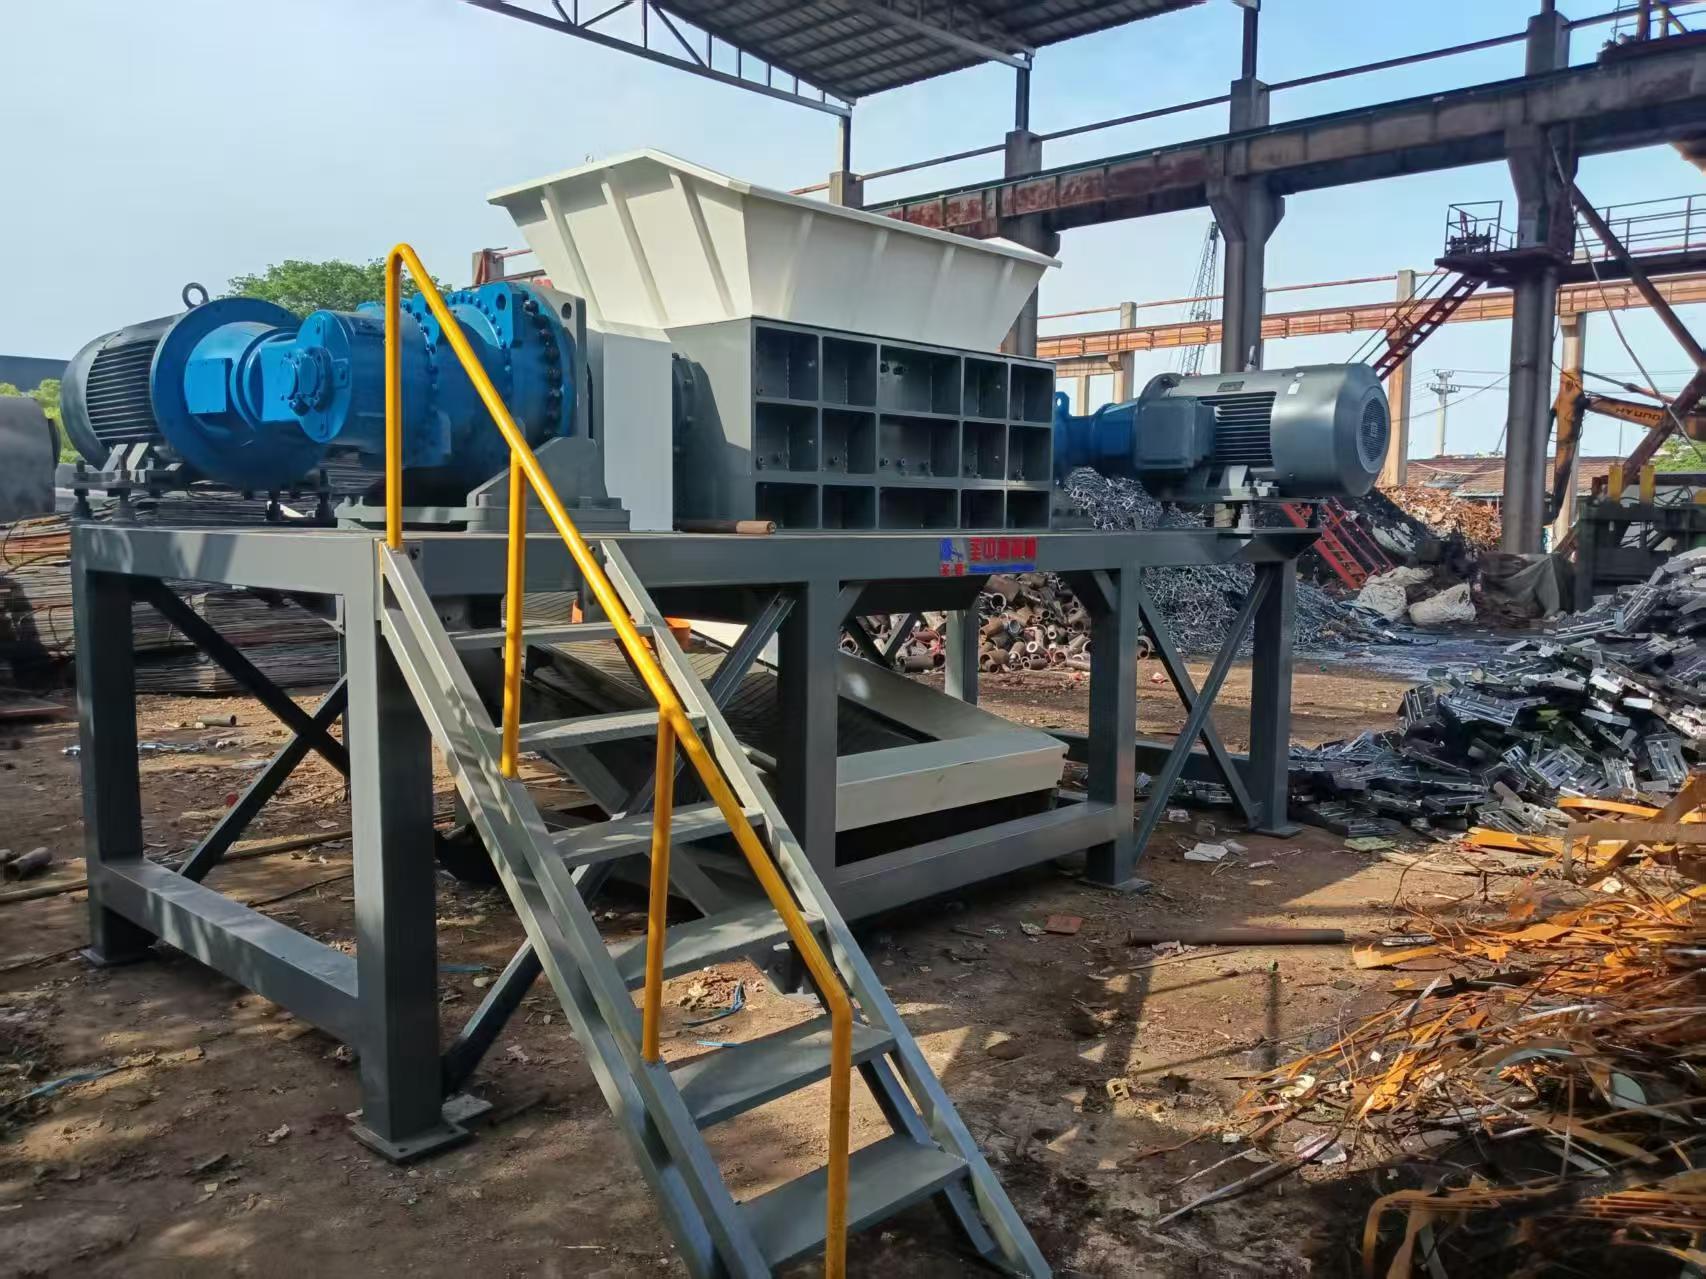
Ever looked at your mounting pile of plastic waste and wished you could turn it into something useful? Building your own waste shredder might be the perfect weekend project to kickstart your recycling journey. With a reliable machine like the Shengzhong Shredder as inspiration, you can fabricate a compact, efficient shredder that tackles everything from bottles to packaging. In this guide, we’ll walk through the design, parts, and assembly so you can start shredding waste into reusable flakes—without breaking the bank or needing an engineering degree.
Scavenging the Essentials: A Treasure Hunt for Parts
Wandering through dusty salvage yards or forgotten corners of a workshop, you never quite know what you’ll uncover—a gear that fits just right, a vintage dial with perfect patina, or a motor that still hums with life. The thrill lies in the hunt itself, piecing together a puzzle where the picture isn’t fully clear until you’ve gathered every fragment. It’s not about perfection; it’s about finding that one component that sparks a project into motion.
The real skill isn’t just spotting a part—it’s seeing the potential in what others overlook. A bent bracket might become a custom mount, an old lamp housing could transform into a steampunk enclosure. This mindset turns each outing into a creative exercise, where limitations of available parts push you toward unexpected solutions. Over time, you learn to read the subtle cues: tarnish that hints at age, weighty metal that signals durability, or the satisfying click of a switch that still works after decades.
Beyond the practical gains, this scavenger’s journey reshapes how you approach building. You stop thinking in terms of pristine, off-the-shelf kits and start envisioning assemblies woven from history. Each recovered piece carries a quiet story, and when combined, they make something entirely new—a device imbued with a sense of continuity, resourcefulness, and a touch of serendipity.
Bringing the Blueprint to Life: Assembly Without the Headaches
We’ve all been there—staring at a sea of screws, cryptic diagrams, and that sinking feeling that you’re missing a crucial part. It doesn’t have to be that way. We designed this with a simple truth in mind: if it takes more than a coffee break to put together, it’s too complicated. Every component snaps, clicks, or slides into place with an almost intuitive sense of rightness, like pieces of a puzzle you’ve solved before.
Forget the toolbox treasure hunt. You won’t need a degree in engineering or a friend you owe a favor to. The instructions trade jargon for friendly nudges, and the parts are labeled like a kindly grandparent organized them. It’s less about following steps and more about watching something take shape in your hands, surprisingly fast.
The real magic? That moment when you tighten the last bolt and realize you haven’t broken a sweat or a single piece. It’s the kind of build that leaves you with a sense of accomplishment, not relief that it’s over. Because assembly should be a quiet pleasure, not a test of patience.
Powering Through: Wiring the Motor Without a Spark
Wiring a motor can feel like threading a needle while wearing oven mitts—especially when you’re trying to avoid that dreaded spark. The trick isn’t just in the connections; it’s in the preparation. Before you even pick up a wire, double-check that all power sources are disconnected and capacitors are discharged. A few extra seconds here can save you from a shower of sparks or worse, a fried controller.
When you’re ready to start, think in layers. Strip the insulation cleanly and make sure no stray strands are waiting to cause a short. Twist the ends tightly, then crimp or solder with care. If you’re using connectors, give them a gentle tug after locking them in place—better to catch a loose one now than when the motor kicks on. And never forget the heat shrink; it’s not just for looks, it’s your first line of defense against arcing.
Finally, test your work like you mean it. Use a multimeter to check continuity and resistance before applying power. Power up the motor in short bursts, watching for any flickering or odd sounds. Go slow, stay focused, and treat every wire like it’s the one that could ruin your day. With a methodical approach, you can wire confidently and keep the sparks where they belong: in the motor itself.
Sharp Edges and Safe Practices: Keeping Your Fingers Intact
Every workshop has its hazards, but few are as immediately unforgiving as sharp edges. A freshly honed chisel or a saw blade with aggressive teeth can slice through skin and tendon before your brain even registers the mistake. The key isn't to fear your tools, but to develop a deep, almost muscle-memory level of respect for where your fingers are at every moment. Think of the area around the cutting edge as a permanent no-go zone, and plan your grip, your push, and your body position so that even a sudden slip sends the tool away from you, not toward your hand.
It's easy to get complacent when you're focused on precision. You lean in closer, you adjust your hold mid-cut, you catch a falling blade out of pure reflex. These are the moments injuries happen. The path to safer work is paved with small, consistent habits: use a push stick when a cut gets too close to the blade, keep your blades sharp so you aren't fighting the material, and secure your workpiece so both hands can stay on the tool—or better yet, so one hand is safely out of the equation. Never try to "just hold something steady" with your fingertips inches from a spinning router bit or a descending chisel.
Beyond the immediate physical precautions, there's a mental discipline required. Listen to the little voice that questions a setup before you make the cut. If something feels awkward or rushed, it probably is. Take the extra minute to clamp, adjust lighting, or clear debris. And if you're tired, frustrated, or distracted, step away. The wood will still be there tomorrow, but your fingers might not be if you push through a moment of poor judgment. Cultivate a mindset where safety isn't a checklist but a constant, quiet awareness that keeps the joy in your craft by keeping your hands intact.
The First Grind: Does Your Machine Actually Shred?
When you drop your beans in for that inaugural run, pay attention to the sound. A high-pitched whine often means the motor is working harder than it should, while a low rumble hints at a true crushing action. Many machines marketed as grinders are actually just glorified blade choppers—they smash beans into uneven chunks rather than methodically reducing them to uniform particles. If your grounds look more like rubble than fine sand, you’ve got a shredder, not a grinder.
Run a handful through and inspect the results on a white plate. Consistent particle size is the hallmark of a proper grinder, whereas a shredder leaves behind a chaotic mix of boulders and dust. This isn’t just about aesthetics; uneven extraction will haunt every cup you brew. A quick test: pinch the grounds between your fingers. If they feel gritty and inconsistent, your machine is tearing fibers instead of cutting them cleanly.
Don’t be fooled by aggressive marketing—true grinding happens when burrs shear the beans layer by layer, preserving oils and aromatics. A shredder, on the other hand, generates heat and friction, scorching the very flavors you’re trying to capture. Think of it like the difference between a steak knife and a hammer: both will break the bean apart, but only one respects the delicate structure inside.
From Bottles to Raw Material: What’s Next for Your Plastic Chips
Turning discarded bottles into clean, usable flakes is just the start. Once those chips are sorted and washed, they hold potential far beyond simple recycling. Think of them as a blank slate—ready to be engineered into fibers, packaging, or even durable goods that rival virgin materials in quality.
The real challenge lies in maintaining purity and consistency at scale. Contamination or mixed polymers can sabotage the entire batch, so modern processing leans heavily on advanced sorting tech and closed-loop systems. The payoff? A steady stream of raw material that manufacturers actually want.
What comes next depends on the market you’re feeding. Some chips get melted into sheet rolls for thermoforming, others are spun into polyester yarn. A growing number find their way into 3D printing filament or injection‐molded parts—proving that post‐consumer plastic can be a resource, not just waste.
FAQ
A sturdy steel frame, a powerful electric motor (1-3 HP), shredding blades (often made from hardened steel or old saw blades), bearings, pulleys, a belt, a hopper, and various bolts and nuts. Scavenging old parts can cut costs significantly.
It’s moderately challenging. You’ll need basic welding skills, the ability to work with metal, and some mechanical know-how. If you’ve tackled DIY projects before, it’s very doable with patience.
It’s primarily designed for plastics like HDPE and PET bottles, but it can also shred thin aluminum cans, cardboard, and even garden waste. Stay away from thick metals or anything too tough that might jam the blades.
Always wear safety goggles, gloves, and ear protection. Ensure the hopper has a guard to keep hands away from the blades. Install an emergency stop switch, and never leave it running unattended. Loose clothing is a hazard.
Costs vary wildly depending on whether you source new or used materials. If you repurpose an old motor and find scrap steel, you might spend under $100. Using all new components could push it to $300–$500.
With a 2 HP motor and a well-tuned blade setup, you can expect to shred about 30–50 kg of plastic per hour. The actual rate depends on the material thickness and blade sharpness.
A welder is almost mandatory for the frame and blade mounts. An angle grinder, drill press, and basic hand tools will handle most of the cutting and assembly. A lathe can help for precise shaft work, but it’s not essential.
Lubricate the bearings regularly, check blade alignment every few batches, and keep the cutting chamber clean of debris. Sharpening or replacing blades when they dull will prevent motor strain and keep efficiency high.
Conclusion
Building your own DIY waste shredder starts with a scavenger hunt for parts—old motors, metal scraps, and salvaged blades become the heart of the machine. Scouring junkyards or your garage yields unexpected treasures, making each build unique. Once you gather these essentials, the assembly process demands patience but isn’t rocket science. You bolt the frame together, align the cutting shafts, and secure the hopper, all while improvising to make mismatched parts fit. Wiring the motor comes next, requiring careful attention to avoid shorts; a solid understanding of basic circuits ensures you power up without sparks. The real satisfaction hits when you flip the switch and hear the motor hum, ready to tackle plastic waste.
Safety can’t be an afterthought—those sharp edges and rotating blades demand respect. Gloves, goggles, and a healthy fear of pinch points keep your fingers intact. With everything in place, the first grind is a tense moment: you feed a bottle through the hopper and watch as it gets chewed into chips. The sound of shredding plastic is strangely satisfying, proof that your machine works. But shredding is just the beginning. Those plastic chips are raw material for new projects—melt them into filament for 3D printing, press them into sheets, or use them for injection molding. Your home-built shredder turns trash into a resource, closing the loop on waste and sparking endless creative possibilities.
Contact Us
Contact Person: Leon
Email: [email protected]
Tel/WhatsApp: 8615385558866
Website: https://www.shred-waste.com