

How Does an Ultrasonic Cleaner Clean Printer Inkjet Heads Fast?
2026-11-12
1. Why Does Inkjet Head Clogging Resist Ordinary Flushing?
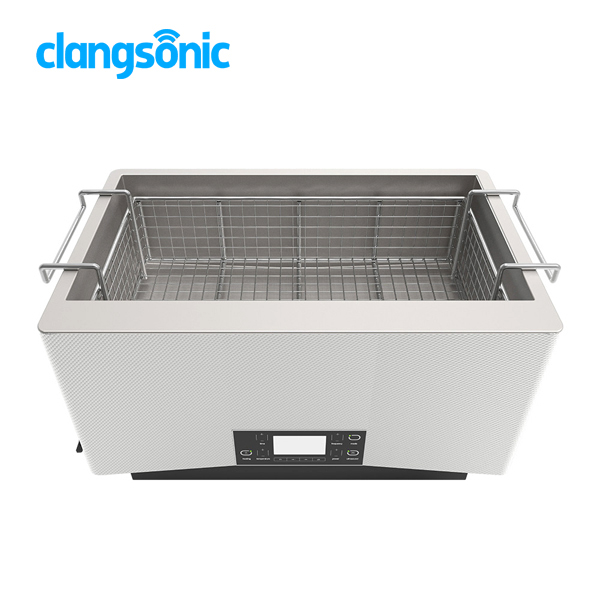
A service technician receives a printhead that has been sitting idle for three weeks. The nozzle check shows missing lines at the center of the array. The technician connects a syringe and pushes cleaning fluid through the inlet. The fluid exits the return port, but the missing lines remain. The reason is that the blockage is not in the main channel. It is in the nozzle plate and in the narrow ink chamber behind the nozzle. Dried ink and pigment particles have formed a film on the wall of the chamber, and a simple flush passes over the film without lifting it. The Ultrasonic Cleaner is used at this point because it introduces a mechanical action that reaches the internal surfaces. Our factory builds cleaning systems for printhead service centers, and our service team sees this pattern every week. Yuhuan Clangsonic Ultrasonic Co., Ltd. has been manufacturing ultrasonic cleaning equipment for over 12 years.
2. How Does Ultrasonic Cavitation Reach the Nozzle Plate and Internal Channel?
The cleaning action comes from cavitation. The transducer generates high frequency pressure waves in the cleaning fluid. During the low pressure half of each wave, microscopic bubbles form in the fluid. During the high pressure half, the bubbles collapse. The collapse produces a micro jet that impinges on the surface and lifts the contaminant film. The bubble size and the collapse energy depend on the frequency. A low frequency produces larger bubbles and stronger collapse, which is effective for heavy deposits but can erode delicate surfaces. A high frequency produces smaller bubbles and gentler action, which is suitable for the nozzle plate and for the fine channels. Our experience with printhead service shows that a two stage approach works best: a lower frequency for the bulk film and a higher frequency for the final pass. Our factory supplies tanks with dual frequency or sweep frequency to cover both stages.
| Frequency | Typical bubble size | Penetration into channel | Best for | Typical cleaning time |
| 25 to 28 kHz | Larger | Moderate | Heavy dried ink on the exterior and inlet filter | 3 to 6 minutes |
| 40 kHz | Medium | Good | General printhead cleaning and chamber film | 5 to 10 minutes |
| 80 kHz | Small | Very good | Nozzle plate and fine chamber walls | 8 to 15 minutes |
| 120 kHz | Very small | Excellent | Final pass for delicate nozzle geometry | 10 to 20 minutes |
3. Which Cleaning Parameters Decide Speed and Safety?
The frequency is only one parameter. The cleaning speed and the safety of the printhead depend on the fluid, the temperature, the power density, and the time. A warm cleaning fluid softens the dried ink and reduces the cleaning time. A fluid that is too aggressive attacks the adhesive that bonds the nozzle plate. A power density that is too high can erode the nozzle edge. Our records show that a temperature of 45 to 55 degrees C and a power density of 3 to 6 watts per liter give a good balance for most printheads. The fluid should be filtered to 1 micrometer and should be compatible with the printhead materials. Our factory provides a compatibility chart with each cleaner, and our test bench confirms the settings before a production run.
| Parameter | Recommended range | Effect on speed | Risk if out of range |
| Fluid temperature | 45 to 55 degrees C | Higher temperature shortens the time | Adhesive softening and nozzle plate lift |
| Power density | 3 to 6 watts per liter | Higher power shortens the time | Nozzle edge erosion and cavitation damage |
| Cleaning time | 5 to 20 minutes depending on frequency | Longer time improves removal | Material fatigue and seal damage |
| Fluid filtration | 1 micrometer or finer | Clean fluid keeps the removal rate stable | Particles redeposit and block the channel |
| Fluid compatibility | Neutral or mild alkaline | Good wetting speeds the film lift | Strong solvent attacks the printhead |
4. Why Do Fixture, Rinsing, and Drying Matter as Much as the Ultrasonic Bath?
A printhead that is placed directly on the tank bottom will suffer from two problems. The first is that the cavitation intensity at the tank bottom is uneven, and the nozzle plate may be exposed to a hot spot. The second is that the particles that are removed settle back onto the plate. Our procedure uses a custom fixture that holds the printhead at 30 to 50 millimeters above the tank bottom and orients the nozzle plate so that the bubbles can reach it. The fixture also protects the electrical connector from the fluid. After cleaning, the printhead is rinsed with filtered deionized water to remove the cleaning fluid residue. The rinse is followed by a controlled air dry at 40 to 50 degrees C. Our factory supplies the fixture and the rinse station as part of the service kit. Our inspection team checks the nozzle plate under magnification before the printhead is returned to the printer.
5. How Should a Service Team Verify That the Head Is Clean and Ready?
The verification should not rely on a visual check alone. The first test is a flow test. The service team measures the flow through the inlet and the return port and compares it with the specification. A flow that is below the specification indicates a remaining blockage. The second test is a nozzle check print. The print should show all lines present and no deflection. The third test is an electrical check. The team measures the resistance of the piezoelectric actuator and compares it with the specification. A change in resistance indicates that the actuator has been damaged. Our test record includes the flow, the print, and the resistance for each printhead. Our factory can provide a test form that the service team can use to document the result. Yuhuan Clangsonic Ultrasonic Co., Ltd. also offers a cleaning trial for a customer printhead before a production order is placed.
What Do Service Teams Ask About Ultrasonic Cleaning of Printheads?
The Ultrasonic Cleaner shortens printhead cleaning time because cavitation lifts the dried ink film from the chamber walls and the nozzle plate, which a syringe flush cannot reach. The speed and the safety depend on the frequency, the fluid, the temperature, the power density, and the fixture. A two stage frequency approach and a controlled rinse and dry routine give a repeatable result. The service team should verify the result with a flow test, a nozzle check print, and an electrical resistance check before the printhead is returned to production. With the right parameters, a clogged printhead can be returned to service in less than an hour instead of being replaced.
